
Installing Python#
In this course we try to provide cloud computing resources that do not require you to install anything on your own computer in order to start learning Python. Of course, it is absolutely possible to do programming with Python on your own computer. First, you need to install Python.
The purpose of this page is to help you to install Python and different Python packages into your own computer. Even though it is possible to install Python from the Python homepage, we highly recommend using Miniconda to install Python. Miniconda comes with Python and a small number of essential packages. Additional packages can be installed using the package management systems mamba or conda. Both offer similar functionality, but we suggest using mamba because it is significantly faster for installing the libraries needed for using Python for GIS.
Miniconda is a light-weight version of Anaconda which is an open source distribution of the Python and R programming languages for large-scale data processing, predictive analytics, and scientific computing, that aims to simplify package management and deployment. In short, it makes life much easier when installing new tools for use in Python. The full anaconda installation comes with all packages needed in the Geo-Python course (and much more!), but Miniconda allows us to save some disk space and avoid package conflicts (important for those installing GIS packages!).
In case you already have Anaconda installed on your computer, you can continue using that during the Geo-Python course without a problem. However, if you are new to Python and have not yet installed anything, we recommend you start by installing Miniconda on your computer.
Do I need to install anything?
As noted above, you can complete the Geo-Python course without installing anything on your own computer! Each lesson contains a launch button for running the code interactively in your web browser.
Install Miniconda#
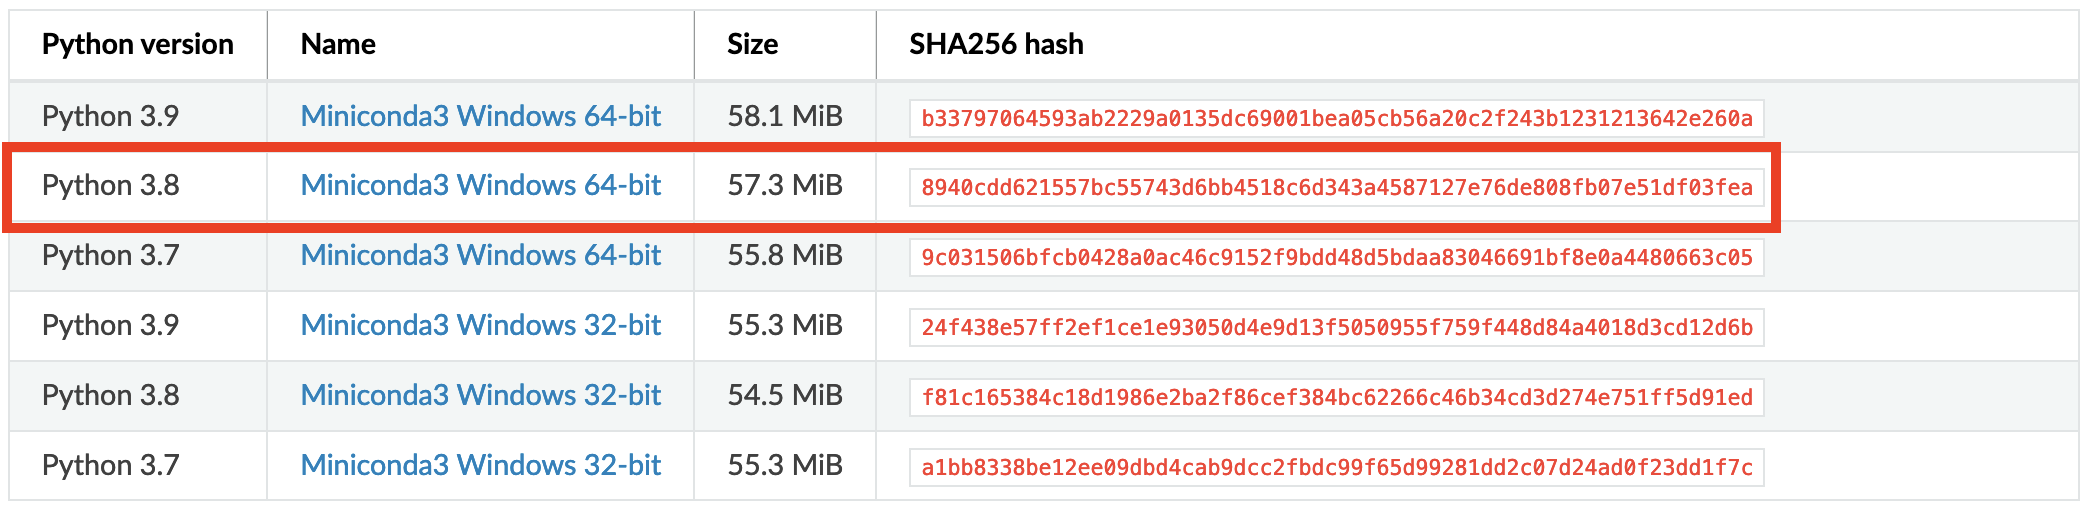
You can find several versions of Miniconda for different operating systems on the Miniconda dowload page. Details on the installation for Windows, macOS and Linux users below.
Note
Although some of the screenshots below highlight download links for older versions of Python, we recommend using Miniconda based on Python 3.11 or later for this course.
Windows#
Miniconda for UH Windows computers
Before proceeding with the installation instructions below, you should check whether you are able to install Miniconda using the Software Center on Windows computers administered by the University of Helsinki. If this option is available to you, we suggest installing Miniconda that way (and you can ignore the installation instructions in this section and jump to the section on Installing the Geo-Python packages.
To install Miniconda, visit the Miniconda download page and download the Miniconda3 Windows 64-bit installer for Windows.
Install Miniconda to your computer by double clicking the installer and install it into a directory you want (needs admin rights). Install it for all users and use default settings.
After the installation is completed, test that the package manager conda works by
opening a command prompt as an admin user
and running command conda --version. If the command returns a version number of conda (e.g. conda 4.10.3) everything is working correctly.
Windows admin rights for UH computers
Windows users with a computer administered by the University of Helsinki: If you don’t have administrator rights on your computer, you might want to apply for an admin account. Read more about administrator rights and software installations.
macOS#
Visit the Miniconda download page and download the Python 3.11 or later installer for macOS.
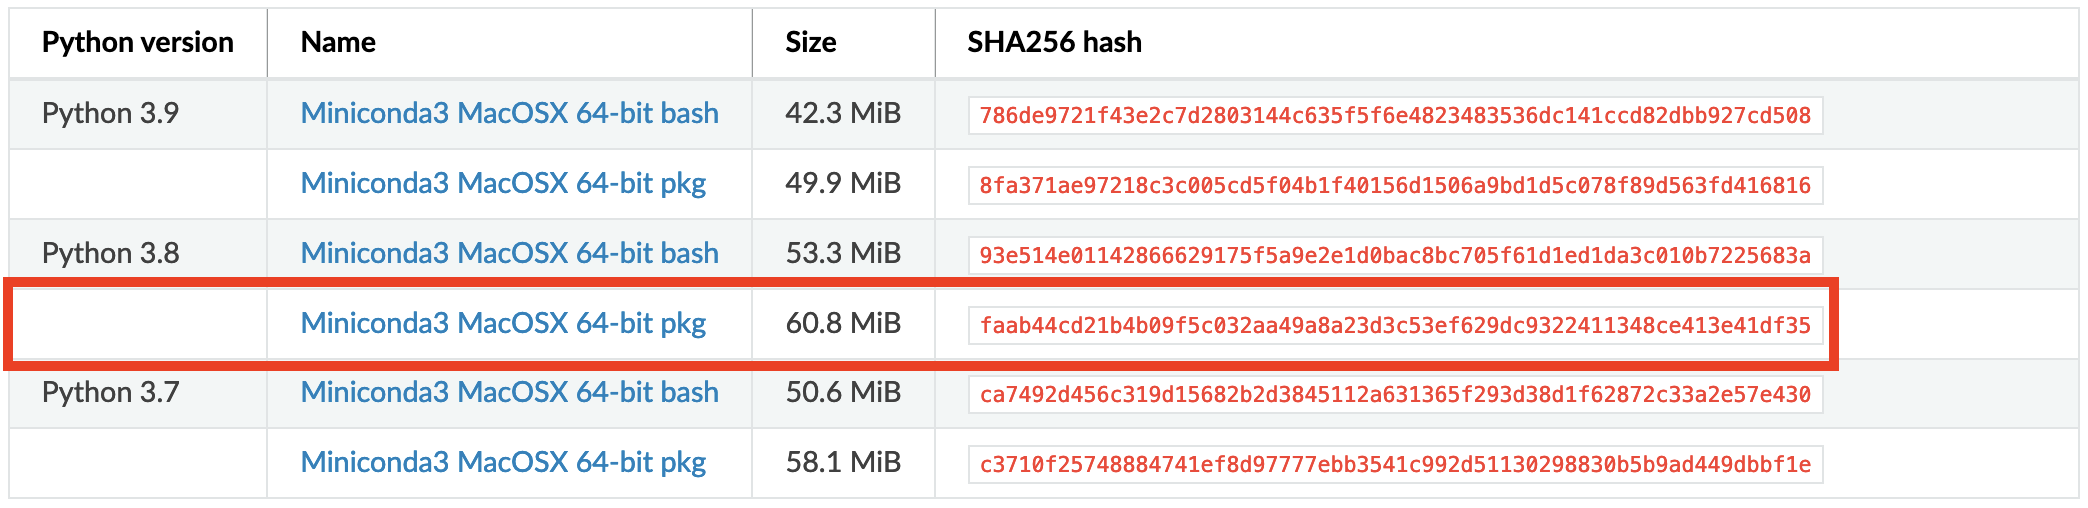
Double click on the package after it downloads and follow the instructions for installation using the default values.
Linux#
Visit the Miniconda download page and download the Python 3.11 or later installer for Linux.
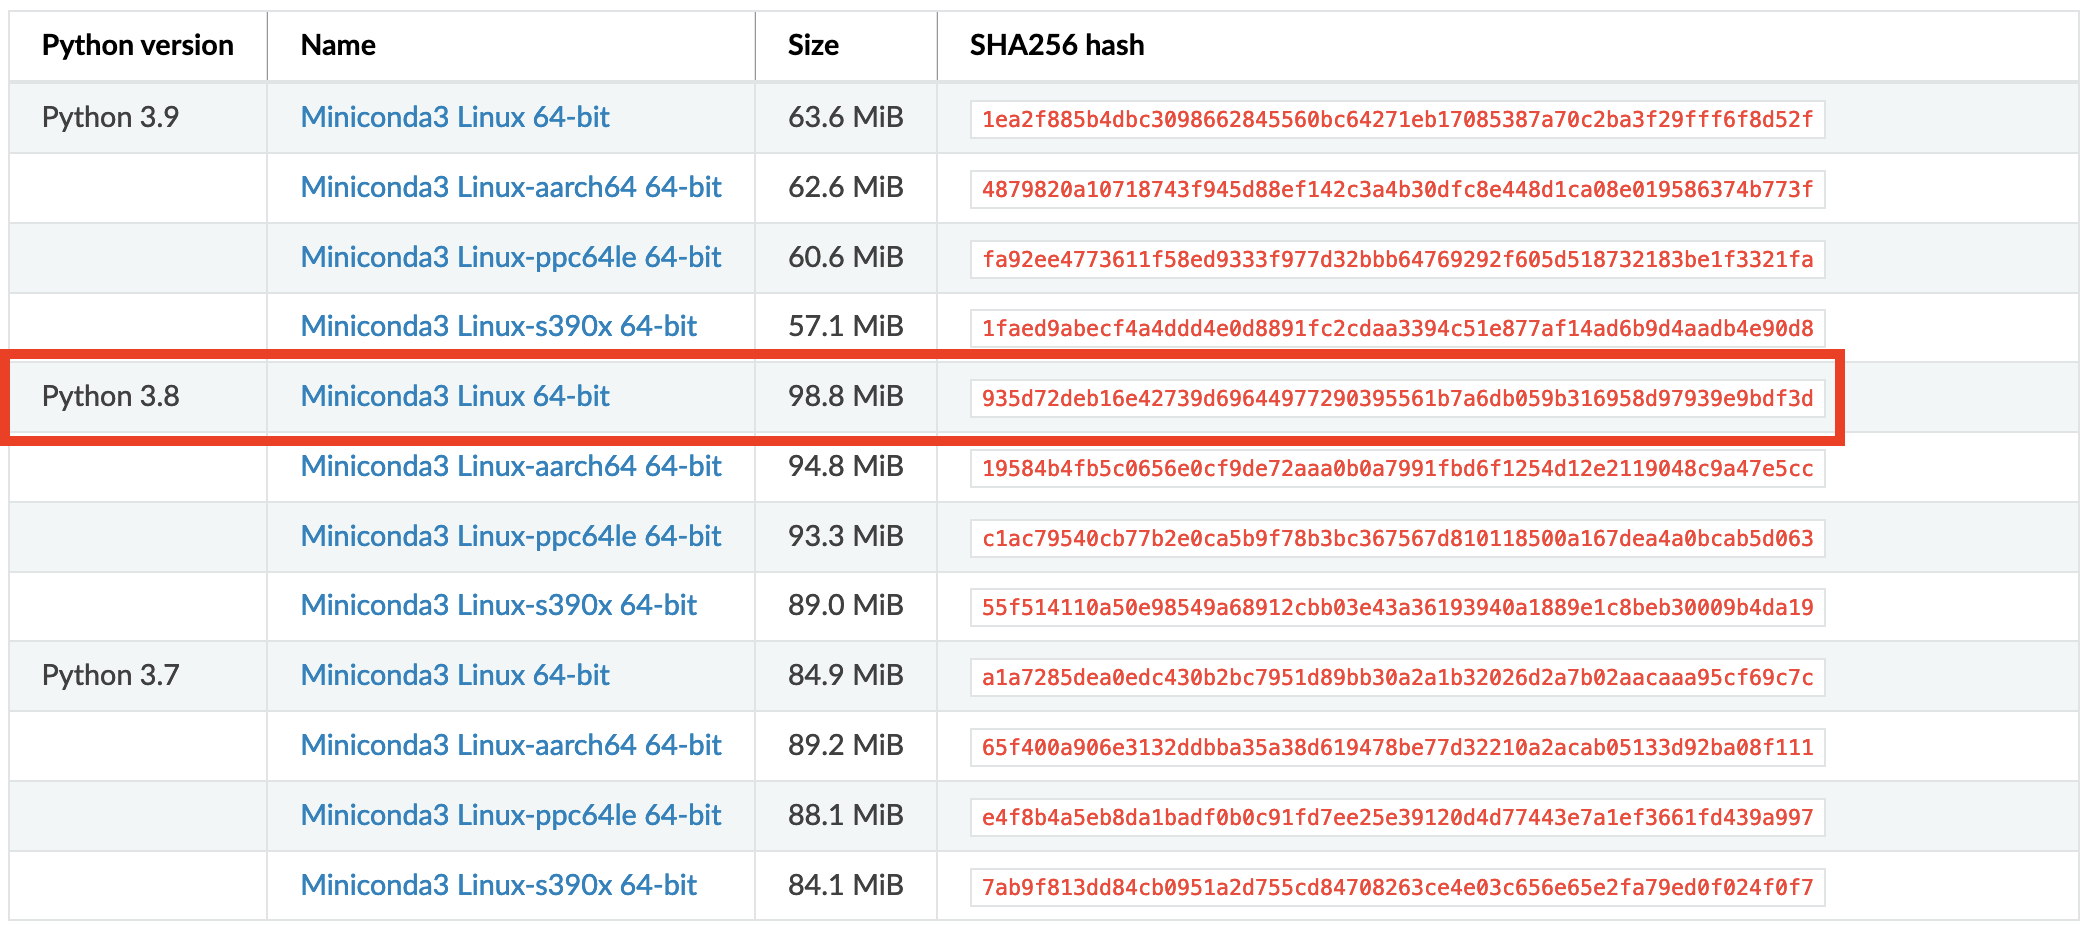
Install Miniconda 3 and add it to system path:
# Download and install Anaconda
sudo wget https://repo.anaconda.com/miniconda/Miniconda3-latest-Linux-x86_64.sh
sudo bash Miniconda3-latest-Linux-x86_64.sh

# Add Anaconda installation permanently to PATH variable
nano ~/.bashrc

# Add following line at the end of the file and save (EDIT ACCORDING YOUR INSTALLATION PATH)
export PATH=$PATH:/PATH_TO_MINICONDA/miniconda3/bin:/PATH_TO_MINICONDA/miniconda3/lib/python3.10/site-packages
Installing the Geo-Python packages#
As noted above, we will be using the mamba package installer to manage the installation of Python packages in Miniconda. To do this, we must first install mamba and then download some Python environment files that contain the list of packages used in the Geo-Python course. This will ensure the Python environment on your computer is the same as that used in the cloud computing system for the course. The steps for installing the Geo-Python packages are below.
Installing mamba#
To get started we will install the mamba package manager in our new Miniconda environment (are you tired of all the snake references yet?). We can install mamba by opening a terminal window or command prompt in Windows (as an admin user) and running the following:
# Install mamba
conda install mamba -n base -c conda-forge
If you’re curious, you can find more about mamba in the online user guide which covers most of the basic things, such as installing new packages.
Downloading the Python environment files#
The files needed for creating the Geo-Python environment can be found on GitHub.
If you are already familiar with using git, you can clone the repository containing the files by typing
# Clone Geo-Python environment files
git clone https://github.com/geo-python/python-environments/
If you are not familiar with git, you can visit the GitHub repository with the environment files, click on the green Code button, and select Download ZIP to download a copy of the files.
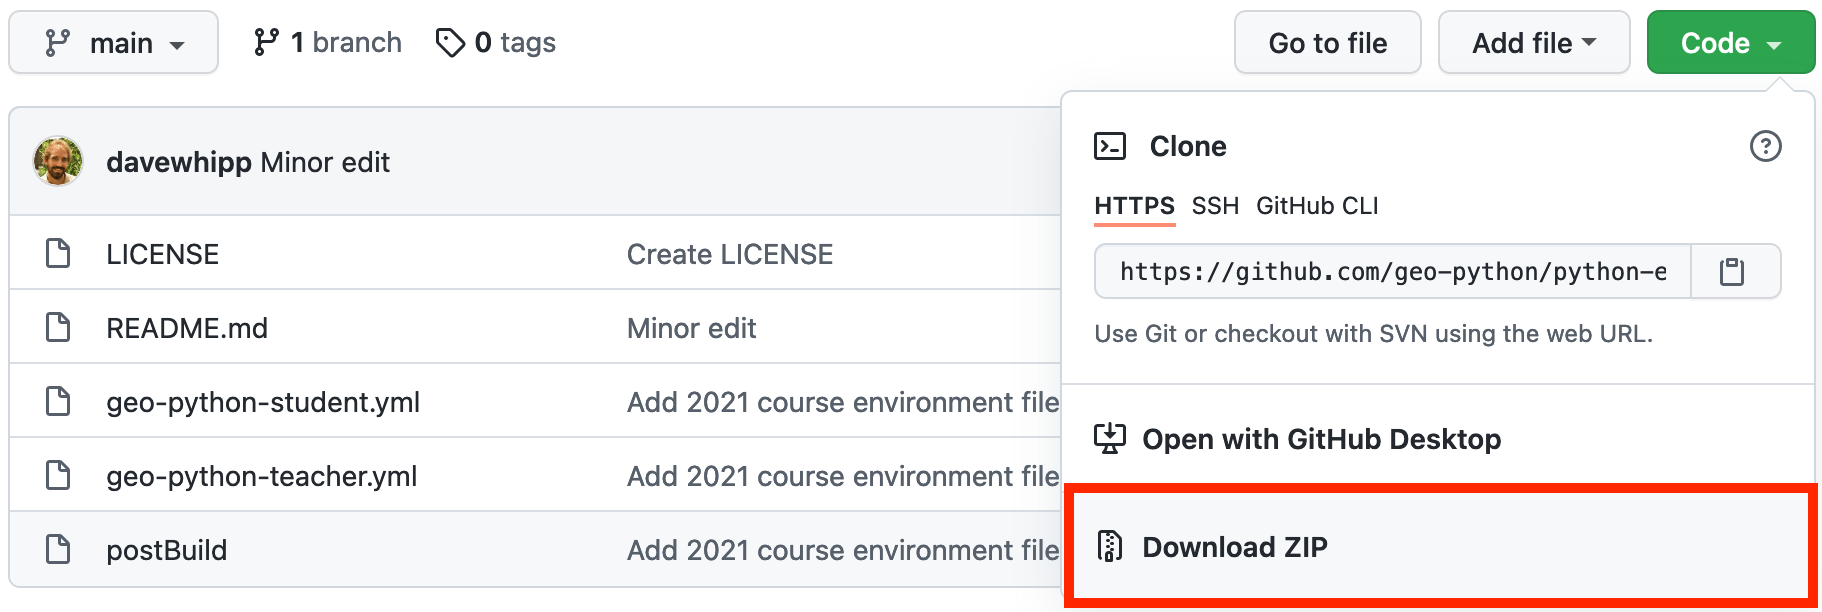
After downloading the files, extract the zip file to your computer.
Installing the packages (student)#
Once you have obtained the code (either by cloning with git or downloading otherwise) can return to your terminal window, change to the directory where you have downloaded the files and create the environment as shown below. For example, on macOS or Linux you would do the following.
# Change to directory containing environment files
cd python-environments

# Create the environment using mamba
mamba env create -f geo-python-student.yml

# Activate the new environment and update Jupyter
# NOTE: conda is used to activate an environment!
conda activate geo-python-student
sh postBuild
This creates a new Python virtual environment called geo-python-student, which contains the packages listed in the file geo-python-student.yml. The new environment is helpful because it will be isolated from other Python packages you might install on your computer and ensure you have all of the packages needed for this course. Finally, the last steps will ensure that the Jupyter environment in the new Python installation has all of its extensions enabled (such as jupyterlab-git).
To use the environment (since it will not be the default environment on your computer) you should type something like the following whenever you open a terminal window to use Python.
# Activate the your Python environment
conda activate geo-python-student
Installing the packages (teacher)#
Once you have obtained the code (either by cloning with git or downloading otherwise) can return to your terminal window, change to the directory where you have downloaded the files and create the environment as shown below. For example, on macOS or Linux you would do the following.
# Change to directory containing environment files
cd python-environments

# Create the environment using mamba
mamba env create -f geo-python-teacher.yml

# Activate the new environment and update Jupyter
# NOTE: conda is used to activate an environment!
conda activate geo-python-teacher
sh postBuild
This creates a new Python virtual environment called geo-python-teacher, which contains the packages listed in the file geo-python-teacher.yml. The new environment is helpful because it will be isolated from other Python packages you might install on your computer and ensure you have all of the packages needed for this course. Finally, the last steps will ensure that the Jupyter environment in the new Python installation has all of its extensions enabled (such as jupyterlab-git).
To use the environment (since it will not be the default environment on your computer) you should type something like the following whenever you open a terminal window to use Python.
# Activate the your Python environment
conda activate geo-python-teacher
The teacher environment is identical to the student environment with the addition of several packages needed for grading assignments using nbgrader.
Running JupyterLab#
We use JupyerLab as the main developing environment during this course.
you can start a JupyterLab instance by running this command (notice the space between the words!):
jupyter lab
After running the command, JupyterLab should open up automatically in a browser window.
Getting the lesson notebooks#
In order to be able to follow the course lessons it may also be helpful to have a copy of the course notebooks. You can download a copy of the course notebooks from geo-python/notebooks.git by clicking on the Code button and then selecting Download ZIP. Alternatively, once you are familiar with git, you can clone the course notebook repository by typing
git clone https://github.com/geo-python/notebooks.git
The command above will clone the notebook files into a directory titled notebooks.
Additional notes#
You can install new packages using the mamba install command.
The basic syntax for installing packages is mamba install package-name.
In addition, we also want to specify the channel from where the package is downloaded using the parameter -c.
Installing the pandas package from the conda-forge channel:
mamba install -c conda-forge pandas
Once you run this command, you will see also other packages getting installed and/or updated as mamba checks for dependencies of the installed package. Read more about package installations in the mamba documentation It’s a good idea to search for installation instructions for each package online.
Conda channels
Conda channels used by mamba and are remote locations where packages are stored. During this course (and in general when installing packages for scientific computing and GIS analysis) we download most packages from the conda-forge channel.
Conflicting packages
A good rule of thumb is to always install packages from the same channel (for this course, we prefer the conda-forge channel).
In case you encounter an error message when installing new packages, you might want to first check the versions and channels of existing
packages using the mamba list command before trying again.